How to Store an E-Bike for Winter: Battery, Tyres and Rust Checklist for US Riders
If you ride an e-bike in the United States, winter is the season that quietly decides how your bike will feel in spring. Cold air, road salt, damp garages, and months of sitting still can drain a battery, flatten tires, and start rust in places you will not notice until your first ride. The good news is that proper winter storage does not require a workshop or a big budget. It requires a careful afternoon, a clean and dry place to park the bike, and a simple routine for the battery.
This guide is written for US riders who plan to store an e-bike for a few weeks or for the whole winter. It covers the three areas that cause most spring problems: the battery, the tires, and rust. It also covers cleaning, chain care, brakes, storage location, and a short checklist you can follow every year. If you ride through winter instead, many of the same steps still help, but you should check the battery and brakes more often and clean road salt off the bike after wet rides.
Why Winter Storage Matters More for E-Bikes
A regular bicycle can sit in a cold garage with few consequences beyond a flat tire and a stiff chain. An e-bike adds a large lithium-ion battery, a motor, a display, wiring, and connectors. Cold does not usually destroy a healthy battery in one night, but long storage at the wrong charge level, in freezing or damp conditions, can reduce capacity over time. Salt and moisture can corrode connectors, bolts, and chain links. Tires can develop flat spots if the bike sits in one position for months under its own weight.
Think of winter storage as protection for the most expensive parts first. A replacement e-bike battery often costs $300 to $800, depending on size and brand. A new set of tires usually costs $60 to $160 for the pair, plus labor if a shop fits them. A rusted chain, worn brake pads, and seized bolts can turn a $25 cleaning and lubrication job into a $150 to $300 shop visit. Spending one afternoon now is almost always cheaper than fixing spring damage later.
Step 1: Prepare the Battery the Right Way
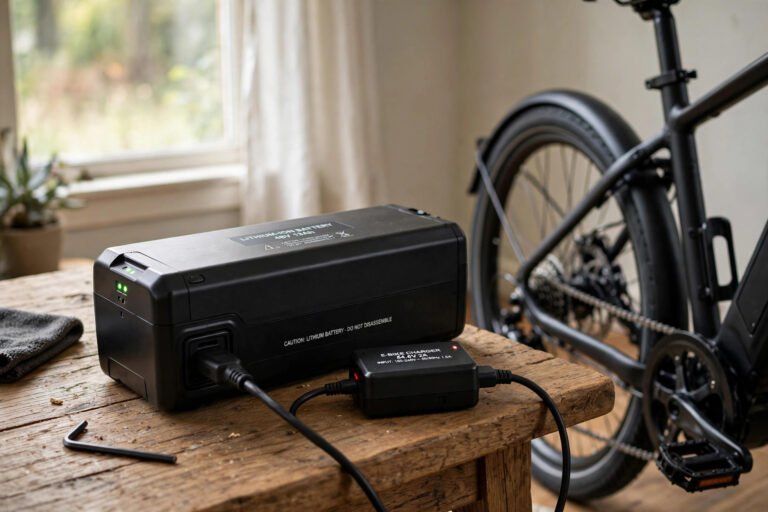
The battery deserves the most attention. Start by reading your bike or battery manual, because the maker knows the exact battery type, charger, and storage range for your model. The general guidance below works for most modern e-bikes, but your manual takes priority if it gives a different charge level or temperature range.
Charge it to about 40 to 60 percent
Do not store a battery fully charged for months, and do not store it empty. A charge level around 40 to 60 percent is a good middle ground for long storage. It gives the battery enough reserve to handle slow self-discharge without sitting at a high voltage for weeks. If your display shows only bars, aim for two or three bars out of five. If it shows a percentage, aim for about half.
Charge the battery at room temperature, not in a freezing garage, and use only the charger made for that battery. After charging, unplug the charger. Do not leave the battery connected to the charger all winter. A charger left plugged in can hide a slow drain, and it adds an unnecessary fire and electrical risk in a storage area.
Remove the battery if you can
If your e-bike has a removable battery, take it off the bike for winter. This protects the battery from cold, damp air, and theft, and it makes the bike lighter if you need to hang it or move it. Store the battery indoors in a cool, dry room, ideally between about 50 and 77 degrees Fahrenheit. A closet, a spare room, or a dry basement shelf works well. Avoid attics that freeze, unheated sheds, and spots near a furnace, water heater, or direct sun.
If the battery cannot be removed, store the whole bike indoors if possible. If the bike must stay in a garage, keep it away from exterior walls that collect condensation, and cover it with a breathable cover rather than a plastic sheet that traps moisture. For more detail on battery life in general, see How Long Do E-Bike Batteries Last. The basic point is simple: lithium-ion batteries last longer when they are kept at a moderate charge and a moderate temperature.
Check the charge once a month
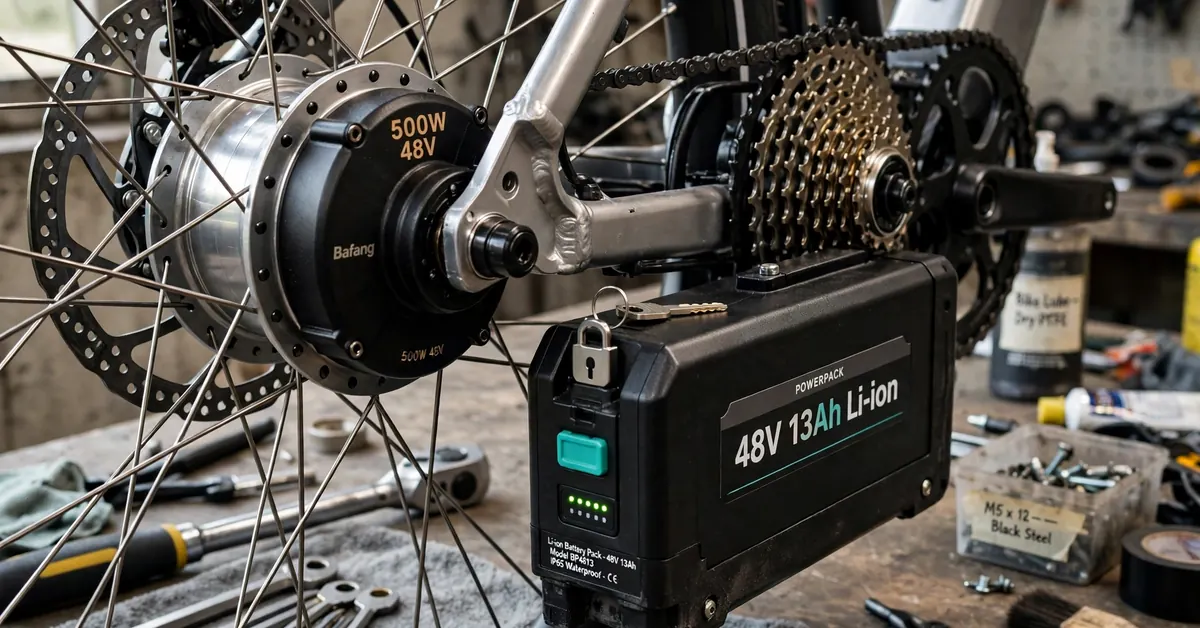
A stored battery slowly loses charge. Set a monthly reminder, even if it is only a note on your phone. Once a month, check the charge level. If it has dropped close to 20 percent, bring it back to about 40 to 60 percent, then unplug it again. This one habit prevents the most common winter battery problem: a battery that drops too low and will not wake up in spring.
Also inspect the battery case and contacts before storage. Wipe the contacts with a dry cloth. Look for cracks, swelling, unusual heat, or a damaged charger cable. If you see swelling, a cracked case, or a strong chemical smell, do not charge or store the battery at home. Contact the maker or a qualified e-bike shop and follow local guidance for damaged lithium batteries. Safety comes before saving a battery.
Step 2: Protect the Tires and Wheels
Tires lose air in cold weather, and a bike that sits for months can develop flat spots where the tire meets the floor. The fix is simple, but it works best if you do it before storage, not in spring when you are eager to ride.
Clean and inspect the tires first
Wash grit, salt, and small stones out of the tread. Check the sidewalls for cracks, cuts, bulges, and dry rot. Spin each wheel slowly and look for wobble, loose spokes, or a tire that is not seated evenly on the rim. Replace a tire with a deep cut, a bulge, or exposed casing before spring, because winter will not make it safer.
Inflate to the recommended pressure, then reduce the load
Inflate both tires to the pressure printed on the tire sidewall or listed in your manual. Cold air will cause pressure to drop, so check again after the bike has sat in its storage spot for a day. If you can, take weight off the tires. Hang the bike from a sturdy wall mount or ceiling hook, or use a bike stand that lifts the wheels. A basic wall mount costs about $30 to $80, and it also saves floor space in a garage or apartment.
If you cannot hang the bike, rotate the wheels a quarter turn every two to four weeks. This simple move spreads the load and reduces flat spots. Also keep the bike off bare concrete if the floor is damp. A rubber mat, a piece of plywood, or a bike tray under the tires helps keep moisture away from the rubber and rims.
Do not forget the valves and sealant
Tighten valve caps to keep dirt out, and check for slow leaks by listening and feeling around the valve after inflation. If you use tubeless tires with sealant, note that sealant can dry out over a long winter. Plan to check or refresh sealant in spring, which usually costs $15 to $30 for a bottle if you do it yourself. For most US riders with standard tubes, a spare tube at $8 to $15 and a small pump are cheap insurance for the first spring ride.
Step 3: Stop Rust Before It Starts
Rust is not only a cosmetic problem. It can stiffen a chain, weaken bolts, and make brake and gear parts stick. Road salt is the main winter enemy, because salt holds moisture against metal long after a ride. Even if you last rode weeks ago, salt residue can keep working in a damp garage.
Wash, dry, and then protect
Wash the bike with mild soap and water, using a soft brush for the frame, wheels, and drivetrain. Avoid a high pressure washer, which can force water into bearings, the motor, and electrical connectors. Pay special attention to the chain, cassette, chainring, brake calipers, bolts, and the underside of the frame, where salt and mud collect.
Drying matters as much as washing. Wipe the bike down, then let it air dry fully in a warm room before you cover it or put it in a cold garage. A bike stored wet under a cover will rust faster than a bike stored dirty but dry. If you have compressed air, use short, gentle bursts to clear water from bolts and chain links, but keep air away from the display, motor seals, and battery contacts.
Lubricate the chain and moving parts
Once the chain is clean and dry, apply a quality chain lubricant made for bicycles. Wipe off excess lube so it does not attract dust. A light wipe of protectant on exposed steel bolts and the chain can help, but do not spray lubricant on brake rotors, brake pads, tires, or grips. Contaminated brake pads lose stopping power and usually need replacement, which can cost $20 to $60 for pads plus labor.
Check cables, brake levers, and shifters for smooth movement. Squeeze each brake lever and shift through the gears before storage. If a brake feels soft, spongy, or gritty, or a shifter sticks, note it for a spring service rather than discovering it on a busy road. A basic tune-up at a US bike shop often costs $75 to $150, while a full e-bike service with brake bleeding and drivetrain work can cost $150 to $300.
Protect connectors and the display
Wipe the display with a dry microfiber cloth and remove any mounted accessories that could trap moisture, such as a phone mount pad or a loose bag strap. If your bike has exposed electrical connectors, make sure caps are in place. Do not wrap connectors in plastic tape for months, because trapped moisture can cause corrosion. A dry, covered indoor spot is better than any improvised seal.
Step 4: Choose the Best Storage Spot in Your Home
The best winter storage spot is dry, stable in temperature, secure, and out of direct sun. A heated garage, a dry basement, a spare room, or an apartment corner all work if the bike fits and the battery can be stored separately indoors. An unheated garage is acceptable in many parts of the US if the battery is removed and brought inside, but a damp shed or an outdoor balcony is a poor choice for months of storage.
Use a breathable bike cover if the bike will sit in a dusty garage. A good cover costs about $25 to $60. Keep the bike upright or hung, and leave a little air space around it so moisture does not collect against the frame. Lock the bike even indoors if other people use the garage, and remove quick release wheels or accessories only if you can store them safely nearby.
For apartment riders, a vertical wall mount or a folding stand can keep a bike out of walkways and away from radiators and windows. Measure your bike and your wall before buying a mount, because e-bikes are heavier than regular bikes, often 45 to 70 pounds. A mount rated for at least 70 pounds is a safer choice than a light duty hook meant for a road bike.
What Not to Do During Winter Storage
- Do not store the battery at 100 percent or at zero percent for months.
- Do not leave the charger plugged in all winter.
- Do not store the bike outside under a tarp that traps water against the frame.
- Do not use a pressure washer on the motor, display, or battery area.
- Do not spray chain lube or protectant on brake rotors or pads.
- Do not hang the bike by a wheel if the rim is damaged or a spoke is loose.
- Do not ignore a swollen, cracked, or damaged battery. Get expert advice first.
These mistakes are common because they feel harmless in the short term. A battery at full charge seems ready for spring, and a tarp seems protective. In practice, both can shorten battery life or increase rust risk over a long, damp winter.
Winter Storage Checklist and Costs
Use this checklist as your one page winter routine. Check each item off before you walk away from the bike for the season, and keep a copy with the battery so you remember the monthly charge check.
| Task | What to do | Typical US cost |
|---|---|---|
| Battery charge | Charge to 40 to 60 percent, then unplug | Free |
| Battery storage | Remove if possible, store indoors and dry | Free |
| Monthly check | Check charge monthly, top up to 40 to 60 percent if low | Free |
| Wash and dry | Wash with mild soap, dry fully before covering | $10 to $25 in supplies |
| Chain care | Clean, lubricate, wipe off excess | $12 to $25 for lube |
| Tires | Inspect, inflate, hang bike or rotate wheels | $30 to $80 for a wall mount |
| Rust prevention | Protect bolts and chain, use a breathable cover | $25 to $60 for a cover |
| Brakes and gears | Test levers and shifting, note issues for spring service | $75 to $150 for a basic tune-up |
| Storage spot | Choose a dry, secure, indoor spot away from damp walls | Free to $80 for storage gear |
How to Wake the E-Bike Up in Spring
Spring preparation is easier when winter storage was done well. Start by checking the battery charge and charging it fully only when you are ready to ride. Inspect the tires for pressure, cracks, and flat spots, and inflate them to the recommended level. Spin the wheels, squeeze the brakes, and shift through the gears while the bike is on a stand or held upright.
Wipe the chain, add fresh lubricant if it feels dry, and take a short, slow test ride in a quiet area. Listen for rubbing brakes, clicking gears, loose bolts, or unusual motor noise. If anything feels wrong, stop and fix it or book a shop visit before a long ride. A careful first ride can reveal problems at low speed instead of in traffic.
If you are thinking about your next bike or how your current bike fits daily riding, our guide to Best E-Bike for Commuting in 2026 can help you compare motor size, battery size, and commuter features before you buy. Winter storage is also a good time to notice what you liked and did not like about your current bike, from tire width to rack mounts to battery range.
Frequently Asked Questions
Should I store my e-bike battery at 100 percent for winter?
No. For long winter storage, aim for about 40 to 60 percent. A full charge held for months can stress the battery, while an empty battery can drop too low and fail to recover. Check the charge monthly and top it up to the middle range if needed.
Can I leave my e-bike battery in a cold garage all winter?
It is better to bring a removable battery indoors to a cool, dry room. If the battery cannot be removed, store the whole bike indoors when possible. Freezing, damp storage increases the risk of capaity loss, condensation, and connector corrosion.
Should I hang my e-bike or leave it on its tires?
Hanging the bike is ideal because it takes weight off the tires and helps prevent flat spots. If you cannot hang it, inflate the tires to the recommended pressure and rotate the wheels a quarter turn every two to four weeks.
How do I stop rust on my e-bike over winter?
Wash off salt and mud, dry the bike fully, lubricate the chain, and store it in a dry spot under a breathable cover. Keep lubricant and protectant off the brake rotors and pads.
How often should I check a stored e-bike battery?
Check it about once a month. If the charge has fallen near 20 percent, bring it back to about 40 to 60 percent. Also look for swelling, cracks, or damage, and get expert advice if you find any.
Closing: A Little Winter Care Goes a Long Way
Winter storage does not need to be complicated. Charge the battery to the middle range, bring it indoors, clean and dry the bike, protect the chain and tires, and choose a dry place to wait out the cold. Add a monthly battery check to your routine, and you will remove most of the risk from months of sitting still.
When spring arrives, you will be glad you took that afternoon in fall. Your battery will be healthier, your tires will hold air, your chain will move freely, and your brakes will feel familiar. That is the real payoff of a good winter checklist: not just a bike that survived winter, but a bike that is ready to ride on the first good day.